Wednesday, May 14, 2014

Two rugs: one is just plain classy, the other is straight up sassy.


"Eleanor," hand-dyed, hand-woven wool rug, 3.75'x5'


Hello lovely people.

So, do you want to hear something pretty cool?

I AM DONE WITH FINALS!!!!!!!!!!!!!!!!!!!!!!!!!!!!!!!!!!!!!!!!!!!!!!!!!!!!!!!!!!!!!!!!!!!!!!!!!!!!!!!!!!!!!!!!!!!!!

I love school as well as the challenge of getting everything together for finals week, but I seriously love that I can sleep again.

I managed to weave two large rugs this past semester...somehow, and in some way, I managed it.  I feel like the Weaving Wonder Woman...I think I need a t-shirt depicting such.  I'm a fibers student, so I can just screen print one, right?

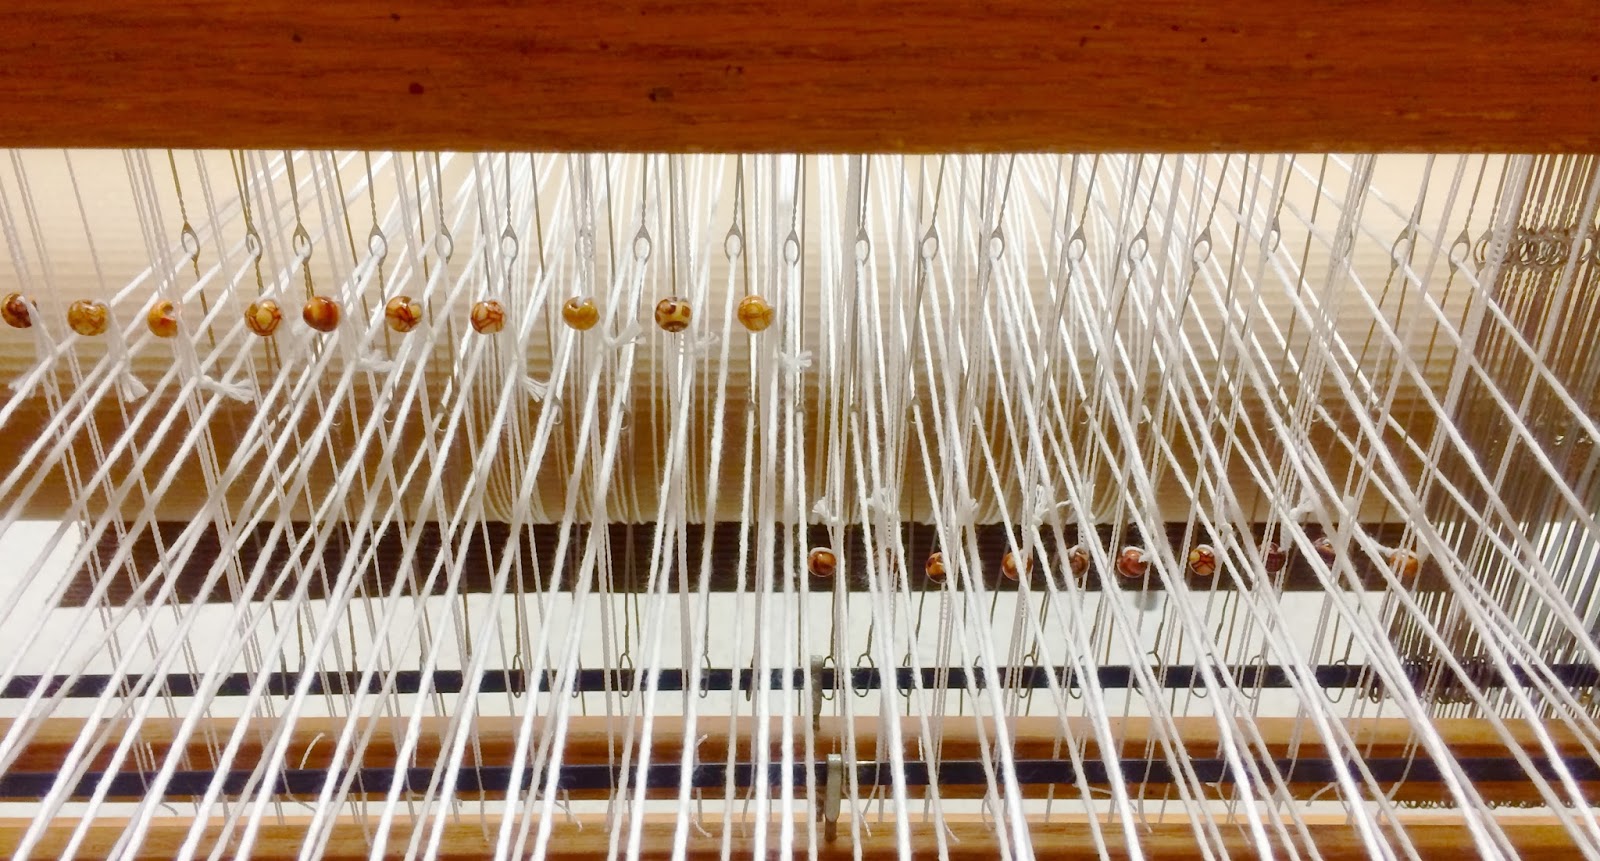
Anyway, the above image is of "Eleanor," one of my latest pieces.  I have been working on her since the beginning of the semester.  I was presented with a few challenges, namely weaving the rug in three separate panels that I needed to stitch together.  Then I ran into the issue of making a fancy rug finish on the top and bottom borders.  Normally, I make a starting and finishing border on the rug while on the loom, but when weaving a rug in three separate panels, it is extremely difficult to match up them up exactly.  As a result, I had to pull all of the borders out to make the panels even and find a rug finish to do all of the way across.  I researched quite a few different methods but found the Maori edge to be an ideal fit for this piece.  Below are a couple of images of what that process looked like.

Making a Maori edge, detail

Making a Maori edge, detail

It's a process in which you basically weave the warp ends (the white strings that run the vertical length of the rug) into themselves, and then stitch the tails up inside of the rug.  You start on one side and work your way across and end up with a tail on one side.  I made the tail into a little braided tassel, and I did the same on the other side but going the opposite direction; that way, I made two sweet little tassels in the opposite corners.  

"Sassafrass," hand-dyed, hand-woven cotton muslin rug (rag rug), 3'x5'

My second rug, "Sassafrass," was kind of done in a blur (you can see it in the image above).  I was running low on time, but I was determined to finish it.  It was the absolute sassiest rug that I have ever woven (hence the name).  I decided that I wanted to work with cotton muslin again as it had been an entire year since I had last worked with it.  This type of rug is called a "rag rug," but I have a really hard time bringing myself to call it that.  I feel like the word "rag" just kind of underrates the rug; so much work goes into preparing the cotton muslin that they are hardly rags at all!  

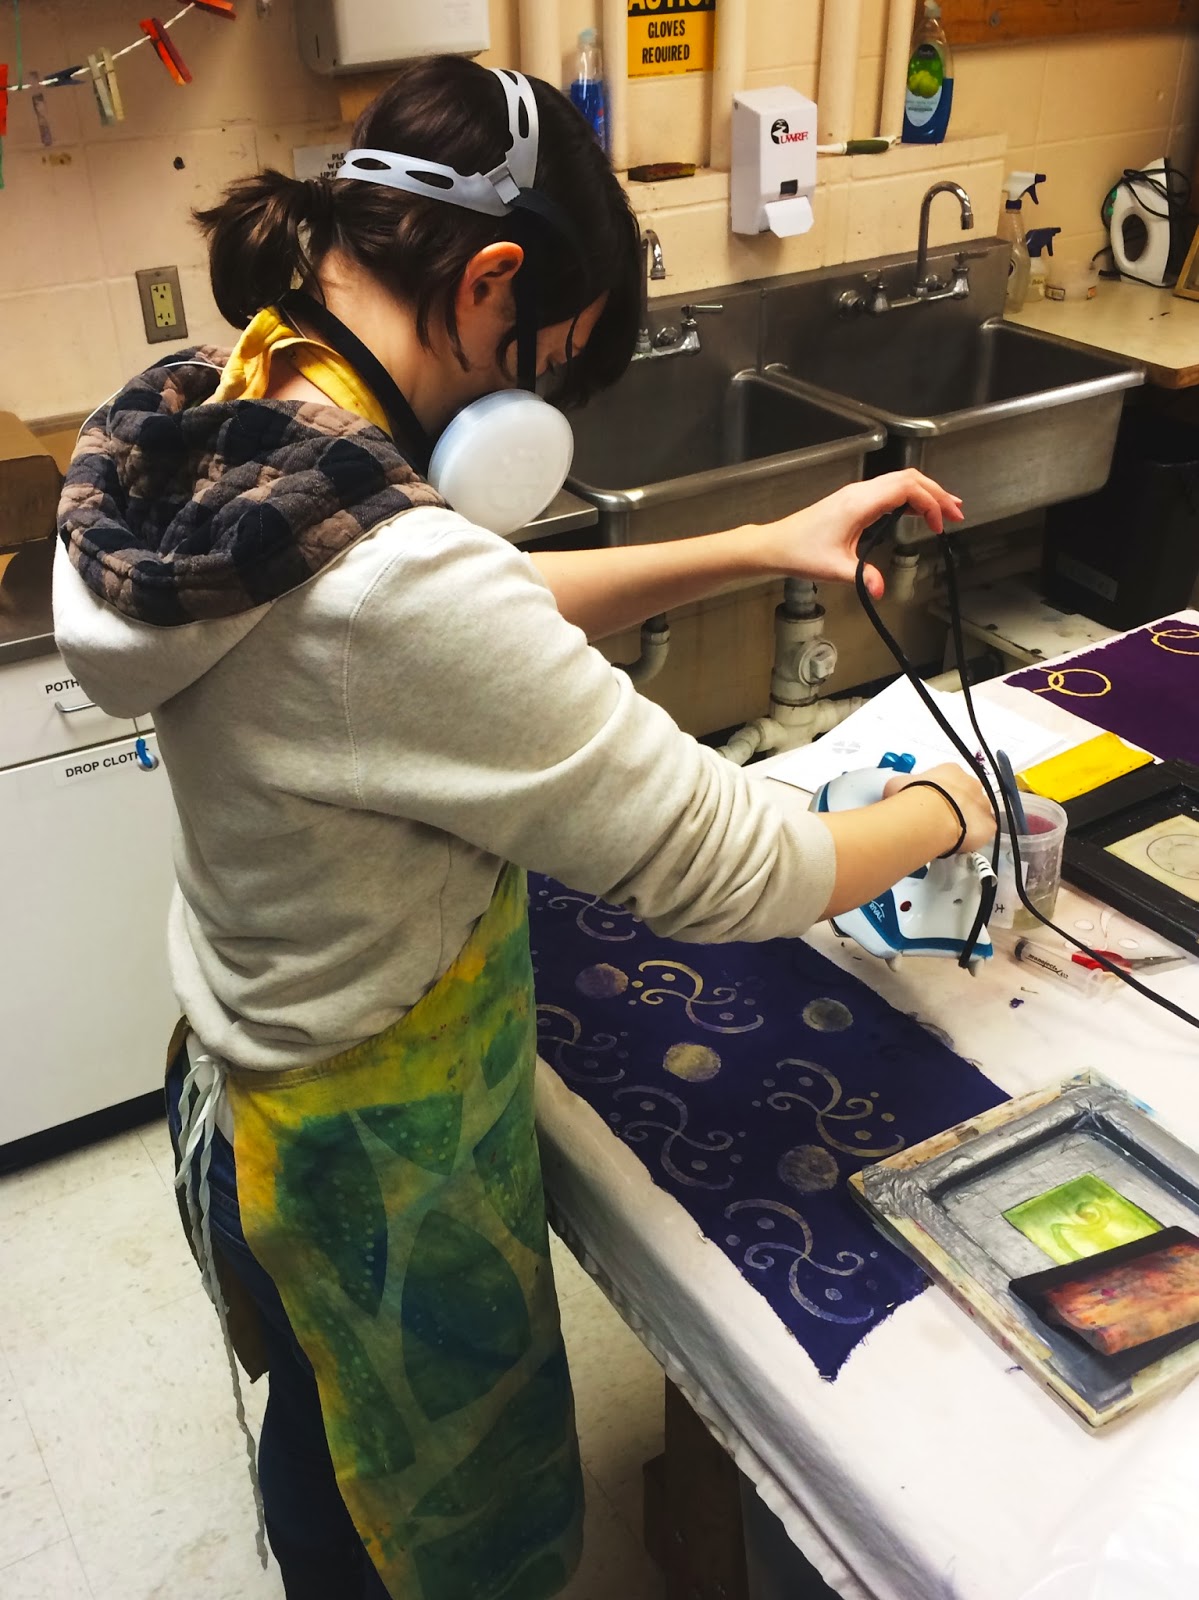
The two images below show a bit of the dye process of the cotton muslin.  First, I calculate how much material I will use, and then I take a bolt of cotton muslin and tear off as many yards as is needed  (in this instance, I needed to dye 30 yards of fabric!).  In this particular rug, I decided that I wanted to use colors in a color bridge.  A color bridge is a dye process in which you make a concentrated stock solution of two separate colors and mix them with each other, from opposite ends of a spectrum all the way to the other end, diluting the solutions as you go.  For this color bridge, I did four sets of six color changes, giving me 24 different colors in the end.  I used variations of a teal/blue color and a red/orange color, and they mixed in the middle to make some pretty sweet neutral grays and browns.  

Dying cotton muslin for a rug, using a plunger to agitate the dye; this plunger has never been used for anything other than agitating dye, rest assured...

Dyed cotton muslin yardage

Ready to weave after ripping all of those strips...whew!

After all of my yardage is happy and dyed, I rip each yard into 1/4" strips that I can weave with.  It sounds like a lot of work, and truly, it is.  Not to mention, weaving with cotton muslin is difficult because when you rip the muslin, you make all sorts of little stringy ends that catch onto everything.  This rug was so sassy because it seemed that every five seconds I was trying to untangle it from the shuttle, the loom, or itself.  But it was well worth it in the end!

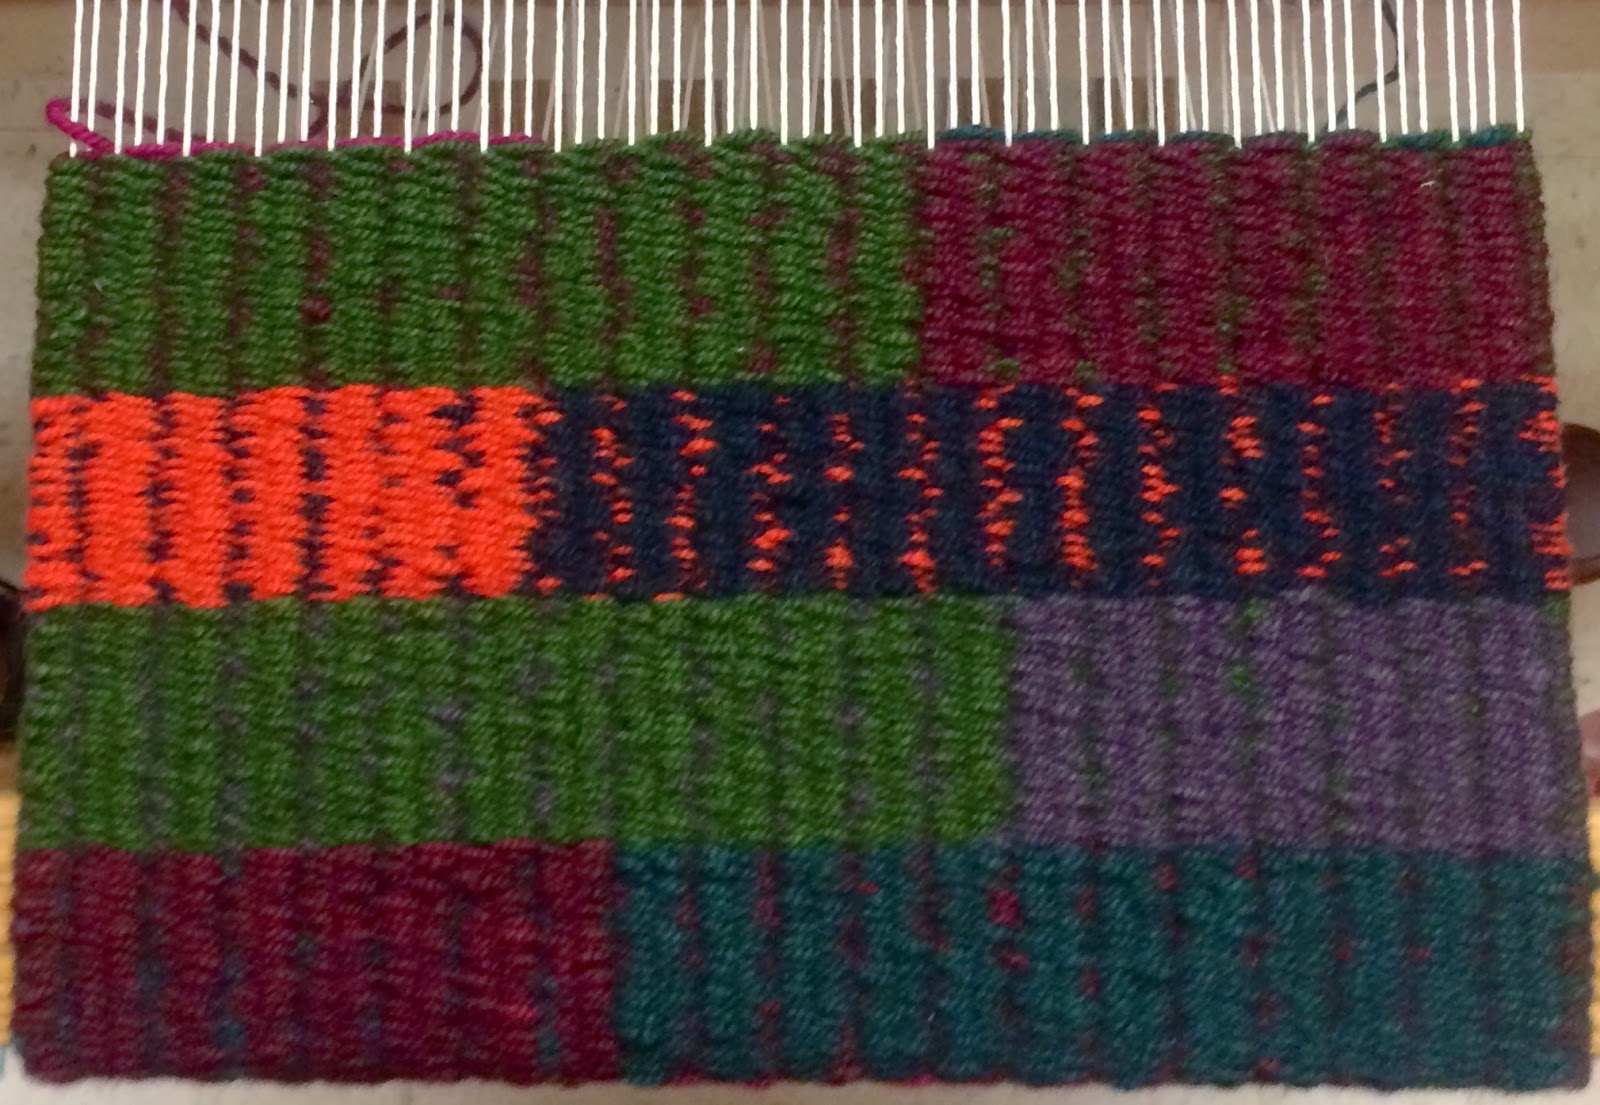
I wanted to create a rug using the shaft switching technique where I create this "brick" pattern, or color breaks in different sections of each stripe going across with all of the orange tones on one side and all of the blue tones on the other.  The result, I am happy to say, is fantastic.  I love it.  And I keep getting comments that when turned on either side, the color breaks read as a cityscape (see the image below...).

It does look like a cityscape, doesn't it?

When I complete a piece, I try to find an appropriate name for it.  I've taken to giving a lot of my fiber pieces actual names, as I see each piece as having its own personality.  Plus, how cool would it be to purchase a rug and tell your spouse, "honey, I just bought Sassafrass!  He's going to look great in our living room!"  Hilarious.  And, my names are usually silly enough or endearing enough that they put a smile on the viewer's face.  It's much more interesting than naming it, "Striped rug #3," or "Boring McBorington of Boresville."  "Eleanor" got her name because she is just plain classy, while "Sassafrass" got his name because he's straight up sassy (intentional rhyme work, right there; you're welcome).    

And after all of that, lovely people, I bid you ado.  As always, thanks for reading, and have yourselves a spectacular sort of day.

Tuesday, April 22, 2014

I MISSED YOU!

"Eleanor," hand-dyed, hand-woven wool rug, 4'x5', in-progress


Hello lovely people.

First and foremost, let me say why, exactly, I've been ABSENT.  There's this monster called school, and it has consumed my very being.  I've briefly climbed from its jaws to update my blog, though I'm afraid I shall be swallowed again!

The above photograph is of the 4'x5' rug creation I had posted about before.  The piece is still in-progress, as I have yet to sew together the panels and weave the border strips along the top and bottom.  I lined up the panels accordingly and snapped a photo, to give you an idea as to what she will look like.  That's right, it's a she.  Eleanor, specifically.  I have gotten into the habit over the past couple of years of seeing each of my pieces as a part of me, a born creation, like a child.  Is this weird?  Incredibly so.  But as born creations with their own, individual personalities, they each deserve their own name.  Also, who wouldn't want a rug with a name?  Way cooler than just saying, "Stripey Rug," don't you think?

And with that, we transition into drawing...

"The Mass of Us," india ink and water color on paper, 19.25"x27.25"

"The Mass of Us," india ink and water color on paper, 19.25"x27.25"

The above drawings were for my "Mass of Us" series that I wanted to work on.  Here, I wanted to turn video game "fan art" into fine art, in hopes of adding credibility to video games as a modern form of art.  In all honesty, I would love to see a giant TV with a gaming console in a gallery, exhibiting games like "The Last of Us," or my new favorite indie game, "Journey."

Well, I would love to stay and chat, but I have to run!  Thanks for stopping by, lovely people, and as always, thanks for reading.  Have yourselves a wonderful, spring day.

P.S.  My website is finally published!  There may be some tweaking here and there in the future, but for right now, it's looking pretty slick!  Check it out!

www.art-by-rosemarie.com

Thursday, March 6, 2014

Drawing Update

"Imperfect, Ugly, and Full of Good Intention," conceptual self-portrait

Detail

Detail

Detail

Detail

Hello lovely people.

Above you can find the final product from the project "Something Unwanted" that I posted about a while back.  I have chosen to title the piece "Imperfect, Ugly, and Full of Good Intention," and I feel that the piece moved from an emotional response to a reflection of myself, making it a conceptual self-portrait.  I've also included details of the project, as it is hard to view everything from a distance.

Below I have posted entries from my Drawing III sketchbook for my newest project, "The Mass of Us."  The premise of this project was to combine the video games "The Last of Us" along with the "Mass Effect" series.  I am using the protagonists from "The Last of Us," Joel and Ellie, who are struggling to survive in a post-apocalyptic world infested with fungal zombies, who have cordyceps that grow off of them and turn them into vicious, terrifying monsters.  In the third installment of the "Mass Effect" series, the Reapers, a sentient, alien race intent on "cleansing" the universe of every evolved species, invade Earth in an effort to completely destroy the human race; I am using these enemies combined with the fungus from the zombies from "The Last of Us," and placing Joel and Ellie in this sort of world.  Joel and Ellie will be simplified figures, silhouetted against the landscape where the brightly colored invaders roam.  Sketching has proved essential to this project, as I need to research and practice drawing certain elements of each game.  I will be posting results as they come in, so stay tuned!


"The Mass of Us," combining the text and logos from both video games

"The Last of Us:" experimenting with making Ellie, an otherwise innocent character, as scary and dark

"The Last of Us:" practicing drawing Joel

"The Last of Us:" practicing rendering the fungi or cordyceps properly

"Mass Effect:" practicing rendering a Reaper ship

"The Mass of Us:" experimenting with placement of protagonists with Reaper forces; the current large-scale drawing of this has changed quite a bit in a good way, but here was the initial idea

I realize that perhaps not many of you are gamers or are familiar with these particular games.  I've included links down below to each game, in case you wanted to investigate exactly where I am coming from.

"The Last of Us"

"Mass Effect"

As always, thank you for reading and have yourselves a lovely, lovely day.

P.S.  Don't forget to check out the links to my Wannabe Photography blog, Pinterest, and Instagram pages; links are above!

Friday, February 28, 2014

A Beautiful Rug in the Making

1st panel, hand-woven, hand-dyed wool, 15"x64"

Detail, end of the first panel, 15"x64"


Hello lovely people.

Well, I've done it.  Panel number 1 is finally complete, and I've found that after so much practice, after so much work, I am still a very slow weaver.  I have about two weeks left to get the next two panels done in time for critique, and I am ready to have an anxiety attack over it.  Seeing the first one completed is helpful; it offers me some inspiration towards my next pieces.

Overall, I am immensely pleased with this first panel; I am getting excited to seeing the two complete and all three together.  I feel a little sad that the photograph above doesn't exactly do the piece justice thus far (in addition to it being pixelated after I tried adjusting the exposure).  I put so much time and consideration into perfecting my group of colors; in reality, they are much richer and darker than in the photo.  The color changes are all very subtle and rich, with pops of the orange here and there.  As I weave, my heart races a little with each stripe of color.  They're so beautiful, and I've found that my love for the red and green complementary colors, as those in my rug, are becoming somewhat of an obsession.  For goodness sake, I dyed my hair red and like to wear green to complement it.  Enough said.

And on that note, dear readers, I bid you all ado.  As always, thank you for reading and have yourselves a pleasant day.  

P.S.  Don't forget to check out my wannabe photography blog, my pinterest, and instagram pages...links are above!

Friday, February 21, 2014

Something Unwanted

The beginning of a something unwanted.

A bit further along...


Hello lovely people.

Here's an in-progress look at a project that I am doing for Studio Drawing.  I've been trying to mix weaving with drawing, and it has been a challenge.  With limited ideas and increasing stress, anxiety, and ultimately, more migraines, I kind of lost it.  One of my classmate's during our in-progress drawing critique advised me to tear everything up and see what happened.  It was the one piece of advice that I had dismissed entirely, and the one piece of advice that I had actually followed.  I tore everything up and started all over.  I gathered every possible thing that I had that was unwanted: scraps of material, old embroidery floss, yarn, pages from my sketch books, and old photo prints that weren't perfect.  I then drew all over the surfaces I could, tore them up, and wove and stitched them back into this piece, using all of my unwanted emotion to push me forward.  It's a very new way of creating art for me, and its ugliness is strange.  As a rug weaver, I try to make something ordinary and domestic into something extraordinary and beautiful.  This way of thinking is implied in every other medium I use: creating something absolutely beautiful to engage the viewer with positive emotion.  I feel like all of the bad and ugly things in the world is what many focus on, and I try to bring back attention to the beautiful things that remain.  When I began this piece, I tossed out any notion of beauty, and focused on the materials individually as well as my frustration and anger toward school and my personal health.  The more I stitch and weave into the piece, the more I see a reflection of myself.  I imagine that if one were able to see their soul, this is what mine would look like: something imperfect and ugly to the common viewer but full of good intent and beauty to those who look a bit harder.

And with that my friends, I bid you all ado.  As always, thanks for reading and have yourselves a pleasant day.

Instagram: art_by_rosemarie
Photo blog: wannabe-photographer.blogspot.com

Monday, February 17, 2014

Snow day!

My classmate, Jaclyn Gese, thioxing designs onto fabric.

Hello lovely people.

Today was a snow day, which is always a glorious occasion.  A few of my classmates and myself were already on campus, however, and decided to go to class anyway.  In the picture above, my classmate Jaclyn is thioxing designs onto fabric.  Whenever you use thiox, it releases fumes that smell of something terrible.  As you can see here, Jaclyn did not have a problem as she donned a gas mask and is designing away (and her fabric is looking quite beautiful if you ask me...).  Below is the bit of work I got done today on my loom.  Honestly, it looks very similar to my last in-progress photo of my 3-piece rug, but I just love the colors so much.  I become more entranced with them the more I weave with them; that bright red-orange stripe seems to glow, and I love it.

Working my way through the first panel of my large, 3-piece rug (will be 15"x5' when completed)

And on that note, my friends, I bid you ado.  Ado, I say!  As always, thanks for reading and have yourselves a lovely, snow-filled day.

P.S.  You can also follow me on my photography blog at: wannabe-photographer.blogspot.com or catch me on Instagram at: art_by_rosemarie.

Wednesday, February 12, 2014

A Cold Start...

Beginning the large 3-piece rug; first panel (will be 15"x5' when completed)

Hello lovely people.
Rosemarie-Flavored Popsicle (eww...)

It is brutally COLD.  If using all capital letter is not dramatic enough to indicate the current temperature, my picture should act as testament as to how cold it is outside.  My eyelashes and hair are frozen, and I even have a frost mustache!  I love the winter weather, but there is not much one can do outside in such frigid conditions, other than stay warm inside and weave away.

I have begun weaving the first panel of my upcoming 4'x5' rug, and so far it is going swimmingly.  I have about 2' woven already, and I hope to have this first panel completed by the end of the week.  I had put so much careful planning into the warp size and each individual color (of which there are 12), that I was nervous to get started; I was afraid that I would make some terrible mistake, and the entire thing would be ruined.  Overreaction?  Quite.  But I wanted to make sure that this piece is perfect, as it will be featured in my senior show in the fall.

For any weavers out there, I have also included an image below of the shaft-switching technique that I use.  If, however, you are not a weaver, you can either try and figure out what I am talking about or skip this next paragraph altogether.

Shaft-switching, using beads on the warps to change harnesses

Shaft-switching is a weaving technique in which the weaver can change the harnesses in which a warp (the white string, in my case) is bound to during the weaving process; normally, everything is threaded before-hand, and changing the pattern is impossible.  I had originally used safety pins through the eye of the heddles, clipping the heddle to the warp strings.  Proving useful but inefficient as the safety pins would always fly off of the loom, I switched to using beads with string tied around them.  The warp is threaded through the string with the bead attached while threading the entire warp through the heddles; using flexible, string heddles on the first two harnesses, the two that I can "switch," I am able to take the bead attached to the warp string and push it through the eye of the string heddles.  So far, the weaving process has been smooth and the beads and string heddles have proved themselves very easy to hook-up and use; they have become good friends to me in my time of need.

Ski shuttles

Ski shuttles, complements of my professor, Morgan Clifford, are also a good friend of mine.  A shuttle acts as a little "vehicle" in which you wind your weft (the dyed wool yarn, in this instance); it carries the weft back and forth through the shed (the space created when lifting each harness).  These "ski shuttles" are super special, not only because they look cool, but also because they glide easily when weaving (which is incredibly helpful when one is weaving rugs).

And on that note, my friends, I bid you ado.  As always, thanks for reading and have yourselves a lovely, cold day.

P.S.  The more I use weaving terminology, the more I realize that anyone that has not woven before probably has no idea what I am talking about, and for that, I apologize.  Perhaps I shall have to include a blog post purely on "weaving explained," should the interest be there...